WYSIWYG Editor (What You See Is What You Get)
A WYSIWYG (What You See Is What You Get) editor is a type of software application that allows users to create and edit content in a way that closely resembles its appearance when displayed or printed. The main feature of a WYSIWYG editor is that it enables users to see what the final product will look like while they are editing it, without needing to understand or write the underlying code or markup language. This type of editor is commonly used for web design, word processing, and content management systems.
Key features of WYSIWYG editors include:
- Visual Interface: Users interact with a visual interface rather than raw code. This interface usually includes toolbars, icons, and menus similar to those found in word processors. While some knowledge of HTML and CSS is beneficial, users do not need to know coding languages to create complex layouts and designs.
- Real-time Editing: Changes made to the content are immediately reflected in the display, allowing users to see the impact of their edits instantly.
- Formatting Tools: These editors provide tools for text formatting (bold, italic, underline), alignment, lists, tables, and other common formatting options.
- Media Integration: Users can easily insert and manipulate images, videos, links, and other multimedia elements.
In Sitefinity
Sitefinity CMS’s rich-text content editor lets users focus on the content first and foremost. Use the text editor to create rich text within the content modules which can then be published on the website: Content Blocks, Lists, Blogs and Events modules.
The content editor is organized around the content editing area – once you start typing your content, the contextual formatting toolbar is displayed. With the help of the contextual toolsets, you can format the text, create lists and tables, insert links, embed media, and so on. In addition, you can work in the HTML mode if you need to edit the source.


The Basics
Format text

The contextual formatting toolbar with in the modules and the content block widget provides you with various formatting options for your content. The toolbar enables users to:
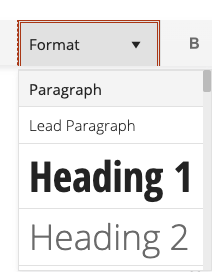
- Change various text attributes via the "Format" dropdown:
- Heading style
- Text color
- Add other text attributes and classes
- Make text bold or italic
- Organize paragraphs in bullet or numbered lists
- Indent and outdent text
- Align text
- Superscript and subscript text
- Insert horizontal lines
- The horizontal line serves as a border line for the paragraph after which it has been inserted.
- Clear the formatting altogether
Create and manage links

Insert a link
- To insert a link, first type the text which is displayed to visitors of your site, then highlight the text which is to be linked and click the Create a link icon . The Insert a link dialog appears.
- In the Link to… field, enter a URL or email address. Alternatively, to link to a page or specific content item from your website:
- Click Select page or content.
- Under Site, if working in a multisite environment, select from which site to link content to by clicking the pencil icon (Edit).
- Under Content type, only choose pages. If you are linking to any other type of content, please link to the page which displays that content.
- Select the specific page to link to. You can narrow down the list of results by typing in the search bar.
- Click Use selected.
- Optionally, to open the linked page or content item in a new window, select the respective checkbox.
- Under More options, you can optionally configure additional settings:
- Add URL query parameters, for example search=FAQ&mobile=true
- Create an anchor to a specific section in the page or content to link to. For example, enter FAQ.
- Enter a tooltip text to be displayed upon hovering over the link, this will also serve as the title.
- In Link style dropdown box, you can select a specific style for displaying the link. You may set the link as a button or make the link a specific color.
- Set additional attributes for the link, such as custom attributes. For example, you may want to modify the target="_blank" attribute.
- Click Insert link.
Edit and delete links
- To change or modify the properties of a link, click on it and choose the Edit link (pencil) icon . You can change the link or content, to which the link redirects, or any other link property.
- To delete a link and its formatting, place the cursor on a link and click the Remove link button from the contextual toolset.
Insert images

The content editor makes selecting and presenting your visual content easy and straightforward.
Upload images
- In the contextual toolbar, click the Insert image icon and choose the Upload an image from your computer button.
- Drag an image in to the screen or browse your computer to find the image and then click Use. You can select and display only one image at a time.
- Under Store image to, you can select the library where you want to put the image by clicking the Edit icon . You can see the libraries you last used. You can also narrow down the list by typing or click Show all libraries and select from the list with all created libraries and choose Use selected.
- Additionally, always change the Title of the image to reflect the message the image is representing.
- In the Alternative text input field, enter text that is used for accessibility reasons and by search engines to describe what is in the image as if describing it to an individual who is unable to see it.
- Click Use this image.
Select images from libraries
- In the contextual toolbar, click Insert image icon and choose “Select an image from library”.
- To choose an image:
- NOTE: You can only choose one image at a time.
- Select from the list with recently uploaded images
- Narrow down the list by typing
- Upload a new image by clicking the Upload icon next to the input field
- Open the Libraries tab page and browse and choose an image directly from a library.
Edit image properties
Once you upload the image, by clicking on it, you can:
- Align the image on the page, for example, in the center.
- Create a link to the image, either to an external website or email, or to a content item on the website by highlighting the image and creating the link.
- Edit image properties:
- Alternative text
- Image thumbnail size. By default, the size is set to original size.
- Add pre-written classes
Delete images
- To delete an already inserted image, in the text editor, click the image and press DELETE on your keyboard
Create and configure tables


Once you insert a table in your text, you can use the table wizard, which makes styling and configuring the table quick and simple. The contextual menu provides you with the key table operations, whereas the wizard enables you to change the design and define each detail of tables. You can tweak the properties, colors, and styling of the whole table or of single cells.
To insert a table in the text
- In the contextual toolbar, click the Create table button.
- With the help of the grid, choose a size for the table, for example, 4x3 table with 4 rows and 3 columns.
- With the help of the contextual table toolset, after placing the cursor on a cell, you can:
- Add a row above or below
- Add a column to the left or to the right
- Delete the whole row
- Delete the whole column
- Enter content in the cells and format with the help of the contextual formatting toolbar.
Using the Wizard
To use the table wizard, choose the Table wizard button on the contextual toolbar. You can configure the following properties:
| Properties | Description |
|---|---|
| Table | You can change the following properties:
|
| Cell | You can change the following properties for individual cell or for all cells:
|
| Accessibility | You can define the following:
|
Note: Creating a custom or responsive table may require editing the HTML.
Embed media & edit the HTML

You can enter and edit content as HTML code by clicking HTML code icon in the right upper corner of the formatting toolbar.
The HTML source editing comes with validation, syntax highlighting, and IntelliSense makes working with the code easy. For example, if you want to add a header in the HTML code, you simply start typing <h> and the editor provides you with a list of suggestions and explanation about each tag.
You can also embed images, iframes (videos, etc.) and links in the HTML, so that they are displayed in the content.
Sitefinity Modules
Content modules create collections of content that can be displayed on web pages and in templates. The following modules allow users to manipulate the typography on the websites through either the WYSIWYG editor, writing HTML or applying pre-written classes to the widgets or content items: Content Blocks, Lists, Blogs and Events modules. Learn more about adding content and classes to each of these modules by clicking on the provided links.
HTML & pre-written classes
Using HTML view in the WYSIWYG editor is the primary way users can manipulate the HTML on the site. Using this options well requires a solid knowledge of HTML and CSS. While the built-in HTML editor is great for small edits, when manipulating a significant amount of HTML, we strongly recommend using an external editor like Visual Studio Code to make edits, then paste them in to the WYSIWYG HTML view.